

Most people don’t notice damage in carpet or upholstery the moment it starts. What they notice is a feeling: the sofa looks tired, the carpet looks “permanently dirty,” or a stain that used to be small now has a shadow around it. The earlier you catch the difference between soil, wear, and true damage, the more options you have—whether that’s a simple deep clean, targeted spot treatment, or a smarter maintenance plan.
This guide is designed to be practical. In about 10 minutes, you’ll know what you’re looking at, what’s likely fixable, what’s probably permanent, and when professional cleaning is the best next step. If you’re already searching for furniture cleaning in Clearwater, you’ll get even more value from this walkthrough because it helps you describe the problem clearly and choose the safest cleaning method for your fabric. For service details on how we clean most upholstery safely, start here: Fabric Upholstery Cleaning Services.
Why Catching Damage Early Matters More Than People Think
The difference between a “quick fix” and a “hard-to-improve problem” often comes down to time.
Soil becomes wear when grit stays in the fibers
Fine grit is abrasive. In carpets, it grinds against fibers under foot traffic. On upholstery, it works into the weave in high-touch zones like armrests and cushion fronts. If you remove it early, you preserve the look and feel of the fabric. If it stays, the fabric starts to look flattened or dull—even after cleaning.
Residue attracts more soil (and makes stains set faster)
If a spill is cleaned with the wrong product, you can end up with a sticky residue. That residue pulls in dust and oils, creating a darker ring or a bigger “shadow” over time. People often think the stain is spreading—it’s usually residue + new soil bonding to it.
The earlier you identify the “type” of problem, the easier it is to choose the right fix
- Soil: Usually responds well to deep cleaning and proper extraction.
- Wear: May improve, but won’t fully reverse (especially abrasion and fiber loss).
- Damage: Needs the right specialist recommendation (cleaning helps in some cases, but not all).
Your 10-Minute Walkthrough: What to Check and In What Order
You don’t need special tools. A phone camera, a clean white towel, and good lighting will do most of the work.
Minute 0–2: Start where people and hands touch most
For upholstery, this is usually:
- Armrests and headrests
- Cushion fronts (the edge you sit on)
- The seat “landing zone”
For carpet, it’s:
- Entry paths and hallways
- The lane between the sofa and TV
- The walkway from bedrooms to bathrooms
What you’re looking for: uneven darkening, oily shine, or a flattened look compared to the rest of the surface.
Minute 2–4: Check seams, piping, and “stress points”
On sofas and chairs, seams tell the truth. Look for:
- Thread fraying
- Popped stitches
- Piping that looks twisted
- Areas where fabric is pulling away from the frame
On carpet, check:
- Edges near doorways
- Transitions between rooms
- Stairs (especially the nose of each step)
What you’re looking for: signs of tension and wear that cleaning won’t fix (but cleaning can help you see clearly once soil is removed).
Minute 4–6: Look for “texture changes,” not just color changes
Color is obvious. Texture is the clue most people miss.
On upholstery, run your hand lightly across the fabric:
- Does it feel rougher in some areas?
- Does it feel sticky, waxy, or “coated”?
- Does the pile look matted or shiny?
On carpet, look at the fibers from a low angle:
- Do traffic lanes look flatter?
- Do they reflect light differently?
- Do they feel less springy?
What you’re looking for: a sign that soil or residue has changed how the fibers behave.
Minute 6–8: Lift cushions and check hidden areas
This is the fastest way to separate “wear” from “soil.”
On upholstery:
- Lift seat cushions and look at the platform beneath
- Check inside corners where debris collects
- Look at the back cushions where hair and dust gather
On carpet:
- Look at the perimeter near walls (dust lines happen there)
- Check under furniture (is it cleaner, or just compressed?)
What you’re looking for: if hidden areas are significantly cleaner, the visible issue is often soil buildup from use. If hidden areas look similar, you may be seeing fading or wear.
Minute 8–10: Take three photos that make the issue obvious
Photos help you compare areas and also help professionals diagnose quickly.
Take:
- A wide shot showing the whole surface (room or furniture piece)
- A close-up of the worst area
- A close-up of a “good” area for comparison
Use consistent lighting as much as possible.
Two Quick, Safe Tests That Tell You a Lot
These are simple and low risk if you keep them gentle.
The white towel blot test (spot-check residue and transfer)
Lightly dampen a clean white towel with water and blot a suspicious area.
- If you see brown/gray transfer: soil is coming up (good sign that deep cleaning will help).
- If you feel tackiness after blotting: residue may be present (a thorough rinse/extraction approach is usually needed).
- If color transfers to the towel: stop—this may be dye instability, and the wrong cleaning could make it worse.
The “direction test” for pile distortion (carpet and some upholstery)
Brush fibers lightly with your hand in one direction, then the other.
- If it looks different depending on direction: you may be dealing with pile shading or nap change (not always “dirt”).
- If traffic lanes stay dull in every direction: that’s more consistent with embedded soil or wear.
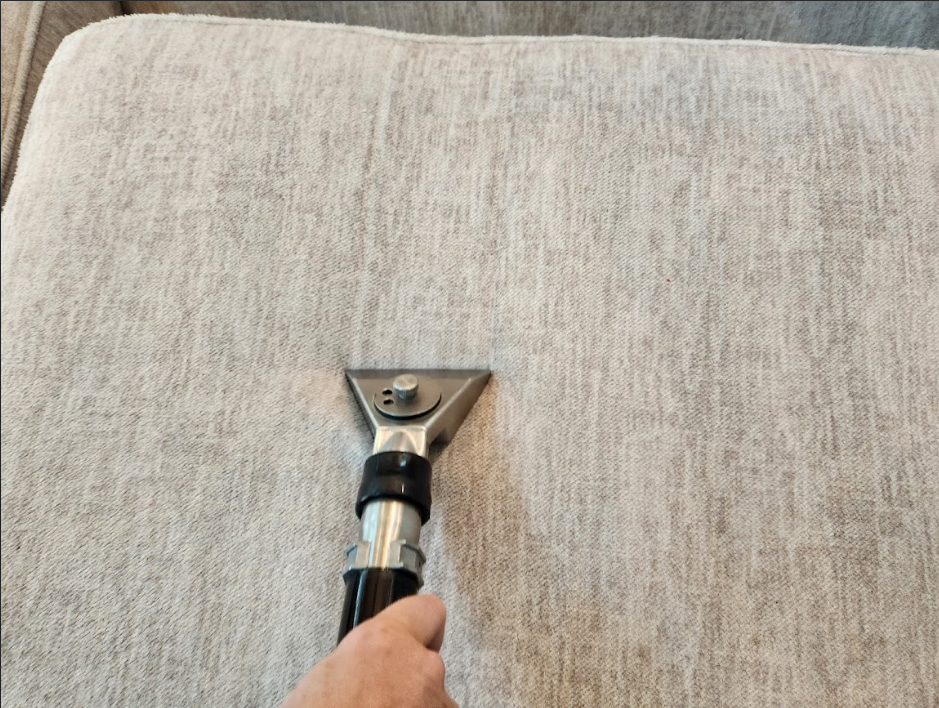
Upholstery: How to Tell Dirt From Wear From True Fabric Stress
Upholstery problems often look similar at first. Here’s how to break them down quickly.
Signs it’s mostly soil (good candidate for professional cleaning)
- Darkened armrests/headrests that match “touch zones”
- Dull cushion faces with no visible fraying
- Odors that seem trapped in the fabric
- Light staining without fabric distortion
Soil-based issues tend to improve strongly after proper cleaning because the fibers are still intact.
Signs it’s wear (some improvement possible, but not a full reversal)
- Pilling (little balls of fiber on the surface)
- Abrasion on cushion fronts (looks slightly fuzzy or thinned)
- “Shiny” patches caused by fiber breakage and compression
- Uneven texture that doesn’t change after vacuuming
Wear means the fabric has changed physically. Cleaning helps remove the grime that makes wear look worse, but it can’t rebuild fibers.
Signs it’s true damage (needs careful handling or specialist advice)
- Torn seams, split fabric, or stretched panels
- Burn marks (candles, cigarettes, heaters)
- Dye bleeding or obvious color loss in patches
- Water rings that reappear after drying (common with DIY over-wetting)
If you see any of these, it’s still worth speaking to a professional—but the goal may be “best improvement possible,” not perfection.
Leather note: dryness and cracking are maintenance issues, not “dirty leather”
Leather doesn’t behave like fabric. If it looks dull or feels stiff, it often needs cleaning and conditioning to restore softness. If you see cracking or peeling, that’s typically wear and dryness—not something that can be “washed out.” For leather care options, ch Leather Upholstery Cleaning Services.
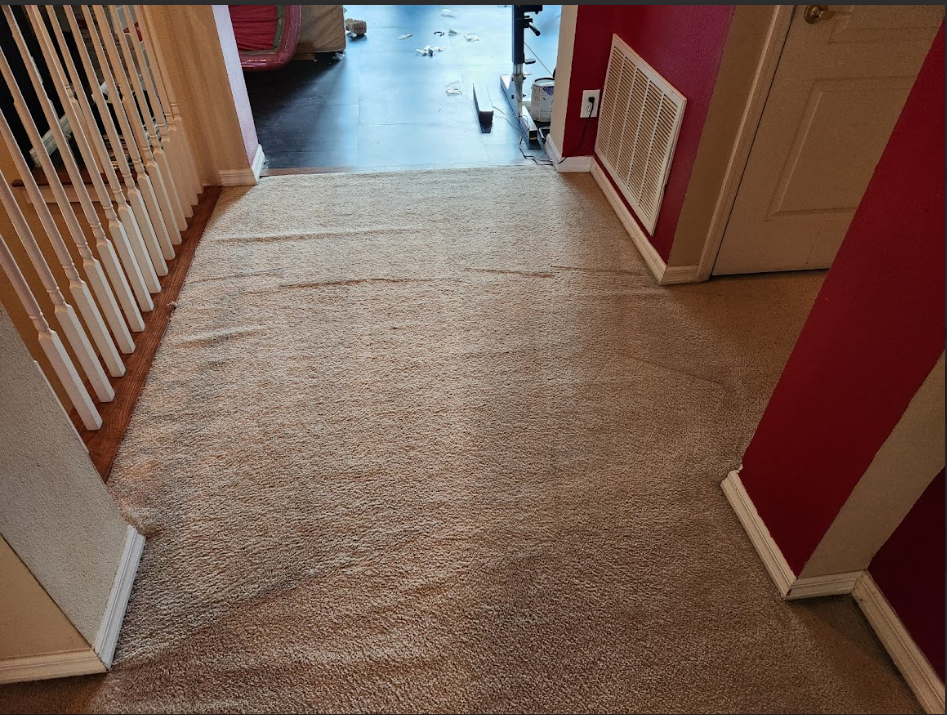
Carpet: The Fast Way to Identify Wear, Matting, and Problem Stains
Carpet issues usually fall into one of three buckets: embedded soil, fiber wear, or stain/chemical damage.
Embedded soil: the “it looks dirty again fast” problem
Signs include:
- Dark traffic lanes that follow walking paths
- A gritty feel underfoot even after vacuuming
- Carpet that looks brighter under furniture
- A general dullness that seems to “spread” slowly over time
This is where deep extraction cleaning is most effective because it’s designed to lift and remove what’s trapped below the surface.
Matting and compression: not always dirt, but dirt makes it worse
Matting looks like:
- Flattened fibers that don’t “stand up”
- A smooth, shiny lane where traffic is heavy
- Less bounce and less softness in walking paths
Some matting is physical wear, especially on lower-quality carpet or in high-traffic homes. Cleaning can still help by removing the abrasive grit that causes faster wear and by improving appearance, but severe compression may not fully reverse.
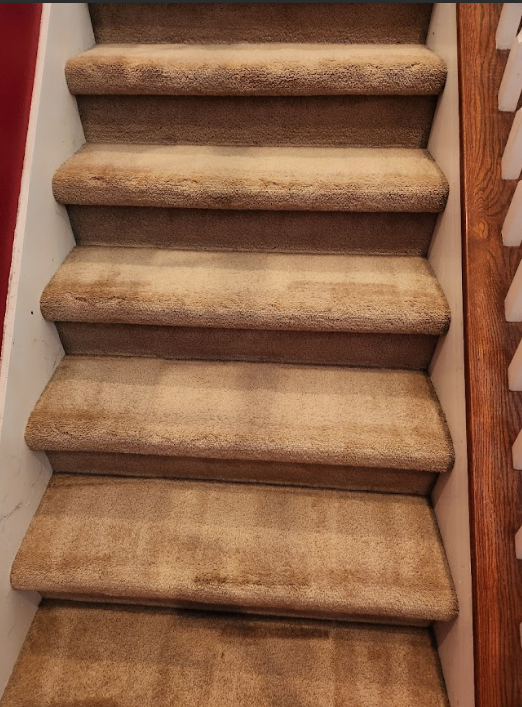
Fraying and edge damage: a sign to act sooner
Look at:
- Doorways and transitions
- Stair edges
- Thresholds and hallway edges
If fibers are fraying, it’s often a mechanical issue (traffic, vacuuming habits, friction). Cleaning helps overall appearance, but the damage itself may need repair.
Stains vs bleaching: the simple difference that changes expectations
- Stain: added color/soil sitting in or on fibers (often improves with proper treatment).
- Bleach/chemical damage: removed color (cleaning won’t restore missing dye).
A quick clue: if the spot looks lighter than the carpet and has sharp edges, it may be bleaching. If it’s darker and looks like it “absorbed” into the pile, it’s more likely a stain.
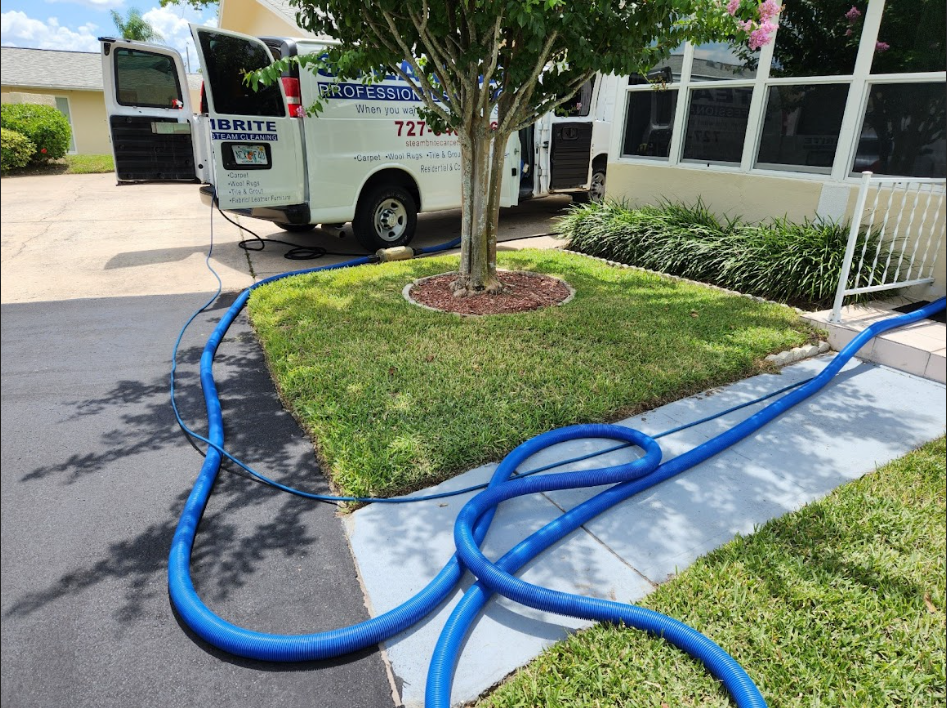
When you’re dealing with soil, traffic lanes, or general dullness, professional extraction is often the best next step. If you’re considering carpet cleaning in Palm Harbor, our process focuses on pre-treatment, targeted spotting, and thorough extraction so loosened soil is actually removed. Details here: Carpet Cleaning Services.
Steam vs Dry Cleaning: When Each Method Works Best (and Why It Matters)
This is where many homeowners get stuck. They know something needs to be cleaned, but they’re unsure what method is safest.
When steam cleaning is usually the right choice
For most durable upholstery fabrics and most carpets, steam cleaning (hot water extraction) is effective because it:
- Breaks up embedded soil with controlled solution and heat
- Lifts residue that causes re-soiling
- Removes loosened grime through strong extraction
Steam cleaning is often ideal for:
- Synthetic upholstery blends
- Heavily used sofas and sectionals
- Carpets with traffic lane buildup
- Homes where “fresh feel” matters as much as appearance
When dry cleaning is the safer choice
Some fabrics and situations respond better to low-moisture or dry cleaning methods, especially when moisture could cause issues.
Dry cleaning is often better for:
- Delicate fabrics and some natural fibers
- Pieces prone to water rings
- Upholstery where dye stability is uncertain
- Furniture where over-wetting is a risk (older pieces, certain weaves)
The biggest advantage of a specialist isn’t just having equipment—it’s choosing the safest method and then executing it correctly.
When to Call a Specialist Instead of “Trying One More DIY Fix”
DIY spotters and rental machines have their place, but there are clear signs you’re better off stopping and getting expert help.
Call a specialist if:
- A stain keeps returning after you clean it (wicking/residue is likely)
- There’s an odor that sprays don’t solve (the source is usually in the fibers/padding)
- You see dye transfer on a white towel during blotting
- The fabric is delicate, vintage, or unknown
- The carpet feels crunchy or sticky after DIY cleaning (residue)
- You suspect pet accidents have soaked deeper than the surface
The specialist advantage: controlled process and better outcomes
Professionals improve results because we:
- Identify fiber type and risk factors first
- Use targeted pre-treatments instead of “one bottle for everything”
- Control moisture and dwell time
- Extract thoroughly so loosened soil doesn’t stay behind
- Set expectations honestly (soil vs wear vs damage)
That combination is what turns “we tried everything” into “it looks noticeably better.”
What to Do Right Now If You’ve Identified a Problem Area
Once you’ve done the 10-minute walkthrough, you’ll usually know which category you’re dealing with. Here’s the simplest next move.
If it looks like soil or residue
- Stop adding more product
- Avoid scrubbing aggressively
- Vacuum thoroughly (slow passes)
- Consider professional cleaning for a full rinse-and-remove reset
If it looks like wear
- Focus on removing soil to reduce further abrasion
- Use protectors where appropriate (entry mats, furniture pads)
- Consider professional cleaning to improve appearance and feel, but expect partial improvement
If it looks like true damage
- Don’t keep experimenting (you can worsen it)
- Photograph it clearly
- Ask a professional for the safest recommendation (cleaning, repair, or realistic improvement options)
Ten Minutes Now Can Save You Months of Frustration Later
Most carpet and upholstery problems look worse than they truly are because soil, residue, and daily use stack up in the same places. A quick inspection helps you separate what’s cleanable from what’s worn, and what’s damaged from what’s just dirty. Once you know the category, choosing the right method becomes much easier—steam cleaning where extraction and removal matter most, dry cleaning where delicate fabrics need a safer approach, and specialist care when the risk of DIY trial-and-error is too high.
If you want help confirming what you’re seeing, we can assess the situation and recommend the safest next step—whether that’s furniture cleaning in Palm Harbor for high-contact upholstery zones or a deep tile and grout cleaning service for carpets that have lost their freshness. You can also check coverage and plan service in your area here: Locations.
When you’re ready, please reach out so we can help you get the best possible result: Contact Steambrite Cleaning Services.
Frequently Asked Questions
1. How can I tell if my carpet is “dirty” or actually worn out?
If it looks much cleaner under furniture, it’s often soil buildup. If it looks similar everywhere or fibers look thinned/shiny, wear may be involved.
2. What are the earliest signs of upholstery damage most people miss?
Texture changes (roughness, tackiness, dull/shiny patches), seam stress, and fabric pulling at “stress points” like cushion fronts and piping.
3. What does it mean when a stain looks like it’s getting bigger?
Often it’s residue attracting more soil, or wicking from deeper layers—less “spreading,” more “reappearing.”
4. What is the white towel blot test and what does it tell me?
A gentle damp blot can reveal soil transfer (cleaning may help), tackiness (residue), or dye transfer (stop—risk of color bleed).
5. What does “pile shading” mean and why does it look like stains?
Some carpet and fabric fibers reflect light differently depending on direction, creating dark/light areas that aren’t actually dirt.
6. How do I tell a stain from bleach/chemical damage?
Bleaching is usually lighter than the surrounding area with sharper edges (dye removed). Stains are typically darker (added soil/color).
7. When is steam cleaning the better choice?
When you need true removal—embedded soil, traffic lane buildup, residue issues, or heavily used upholstery where extraction makes the difference.
8. When is dry cleaning safer than steam for upholstery?
Delicate or moisture-sensitive fabrics, pieces prone to water rings, uncertain dye stability, or older furniture where over-wetting is a risk.
9. What are the clearest signs I should stop DIY and call a professional?
Recurring stains, odor that won’t go away, dye transfer on a towel, crunchy/sticky feel after DIY cleaning, pet accidents that may be in padding.
10. What photos should I take to get a fast, accurate professional assessment?
A wide shot, a close-up of the worst area, and a close-up of a “good” comparison area—ideally in the same lighting.